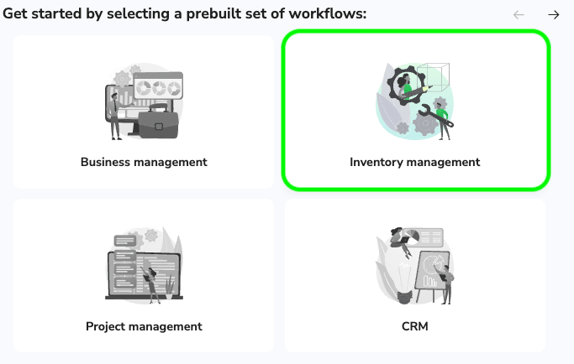
How to get started with prebuilt Inventory management workflow
If you've decided to use our prebuilt Inventory management workflow template check this document to get started with the template. This guide will go through the necessary steps in order to use the main processes as designed.
To get started with our template it is mainly run thru the following processes:
Sales and projects- To create "Sales and projects" activities, you should have activities in the "Companies" (1.) dataset.
-
- To create "Purchase orders" you need to have activities in the "Companies" (1.) dataset and "Purchase order rows" (5.) which require activities in the "Components" (2.) dataset
- To get the full potential out of "Products", you need to have activities in the "Part catalogue" (4.) dataset
- To create "Sales orders" you need to have "Sales and projects" activities
- To use the full potential of "Sales orders", you need to have "Sales order rows" (4.), which consist of activities on "Components" (2.) and "Products" (3.) datasets.
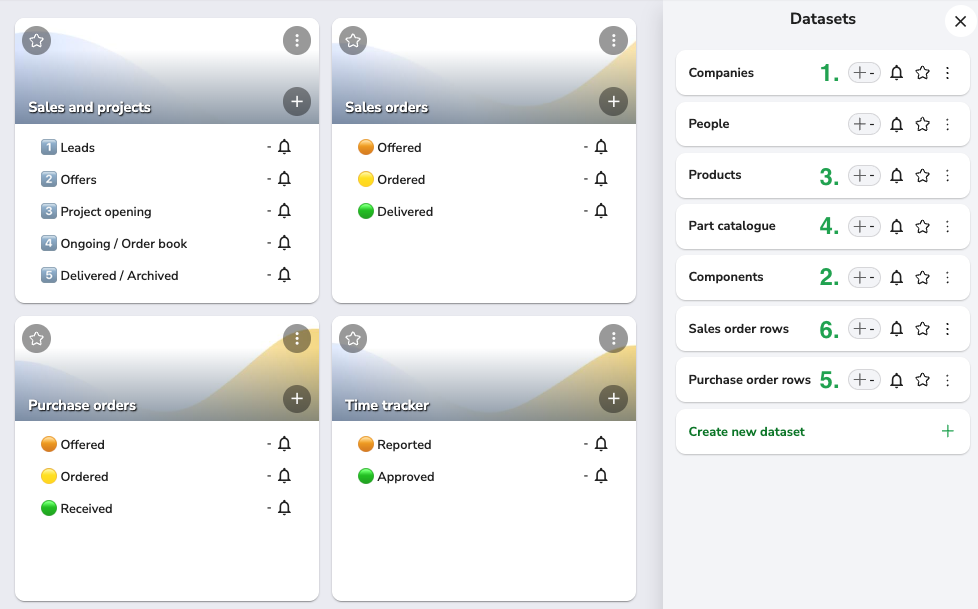
Companies (1.)
So let's get started with adding a company to the "Companies" dataset.
Click the (+) icon you see next to the number 1. in the picture above.
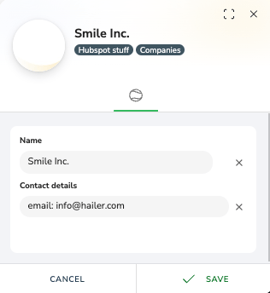
The structure is quite simple, just add the company name and you are ready to save it. Add contact details if you'd like to.
Components (2.)
Adding a component follows the same path, next to the number 2. Click the (+) icon.
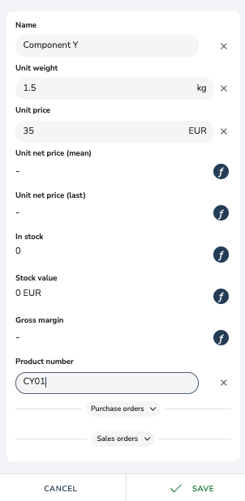
Add the name, unit weight, unit price, and product number for your component, and then save.
For our example we will create components called "Wooden table top", "Wooden table leg" and "Screw". You can play around with the unit weights and unit price as you like. We will use this example later on in the "Part catalogue"
Unit net prices will be calculated later on when you've made purchase orders.
Products (3.)
Next to the number 3. Click the (+) icon.

Add the name, and unit price for your product.
The products weight and unit net price will be calculated from the Part catalogue dataset activities that are linked to the product.
For this example, let's create Product called "Wooden table"
Part catalogue (4.)
Next to the number 4. Click the (+) icon.
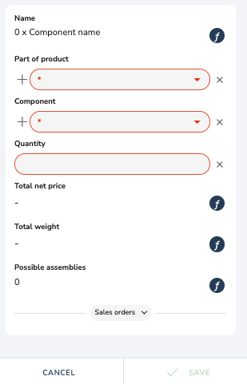
Choose the product from "Part of product" dropdown, in this example we will use the Wooden table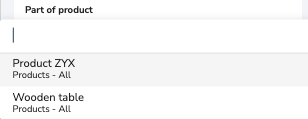 .
. 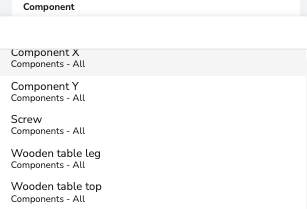
And then choose the Component.
Let's start with the wooden table top. After you've saved this create two more activities in "Part catalogue" dataset. Part of product will be same Wooden table, but use Wooden table leg and Screw as components. You can choose the quantities by yourself, but we will be using 4 for the table legs and 32 for screws.
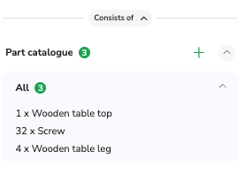
Now if you'd go back to the "Products" dataset, you could see that the Wooden table product consists of following items:
Purchase orders (5.)
Next to the number 5. Click the (+) icon.
To create the base for purchase order, just add the Supplier from the dropdown and then save the activity,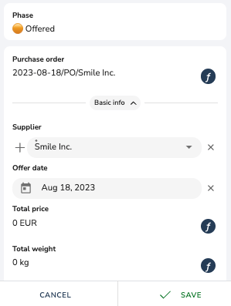
After saving the activity, you are now able to create purchase order rows. Click the green (+) icon.
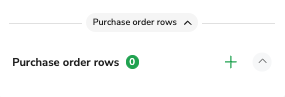
It will open the dialog for Purchase order rows
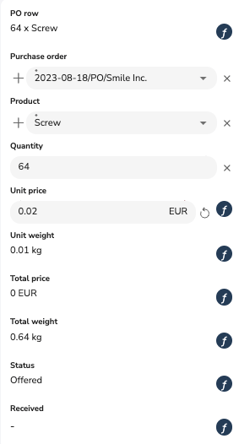
Let's now create 3 purchase order rows, above you can see example of ordering 64 screws.
Create 2 more activities for wooden table legs and table tops. You can once again choose the quantities by yourself.
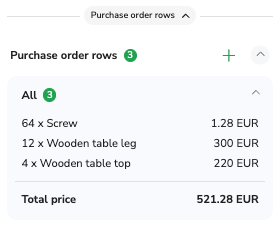
Here's an example what our order rows look like.
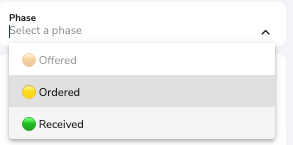
Now if you'd like to see these items in stock. Update the Purchase orders activity to Ordered and then to Received phase.
Sales orders (6.)
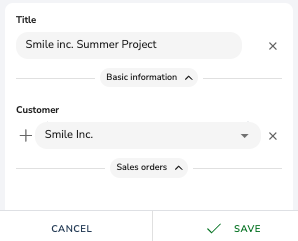
Let's start this section by creating an activity to the "Sales and projects" workflow.
Start by coming up with a Title to your new project and, if you have customer to choose choose one from the dropdown list, then save.
Let's say that this customer wants to order a few wooden tables.
We can create the activity under the "Sales orders" subheader by opening it and the clicking the green (+) icon, or directly from the "Sales orders" workflow.
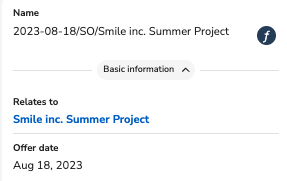
When you create sales orders to the main activity, just open the dialog and save, all you need to have at this point is activity link in "Relates to" field.
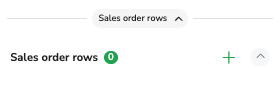
After this you can add "Sales order rows" to your sales order, by clicking the green (+) icon under sales order rows subheader
When adding sales order rows, you have possibility to either add "Products" on "Components" to the order.
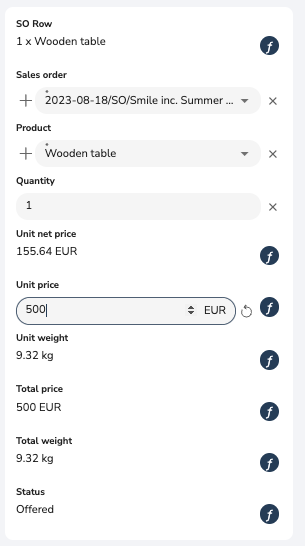
For this sales order we decided to select one Wooden table. The unit price and other information comes directly from the previously created activities in their respected processes.
By moving the "Sales order" activity to Delivered phase, it will deduct the items from your inventory.
There you go!
Now you're all set the start creating your own full blown inventory management and sales funnel included purchases etc.