Hailer is a great tool if you want to create a business management platform just for your needs. This article focuses on how to configure custom workflows.
Let's get you familiar with few terms:
What is a workflow module?
Hailer workflows are predefined workflows, which are configured in the workflow settings. This allows the process owner (YOU) to define which steps the process consists of. You can also define what data you want to collect in each phase of your workflow. The process phases can be linked to each other in any order specified by the process owner.
Inside the process module, you can manage any tasks, projects, or items that move in that workflow. We call these items Activities.
What is a dataset?
Datasets are for storing and handling more static information such as customer data or equipment database.
Datasets have similar process editor as the process modules. The significant difference is that in datasets, moving the activities between the phases, which we, in this case, call categories are disabled.
The picture below shows where you can access the settings.
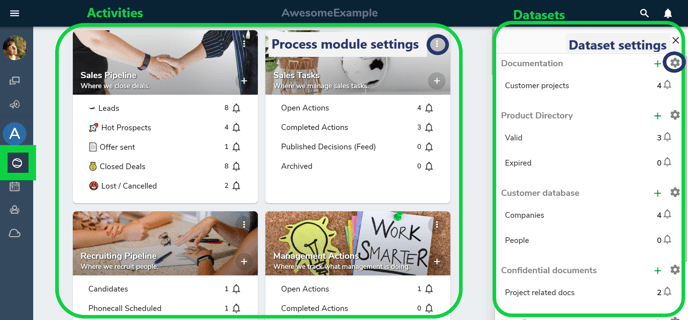
A quick tour of how to create a new process:
Getting started - figure out your process flow.
Before you start to configure the workflow into Hailer, you might want to draw you workflow on a paper or play around with some post-it notes. Or use a tool such as whimsical.
If you have a good picture of what you would like to achieve, you can also start directly to 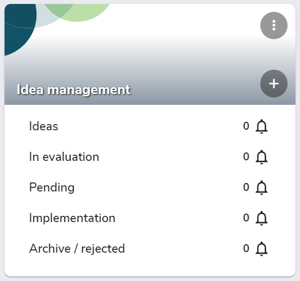 configure the workflow. Don't worry; changes are easy to make.
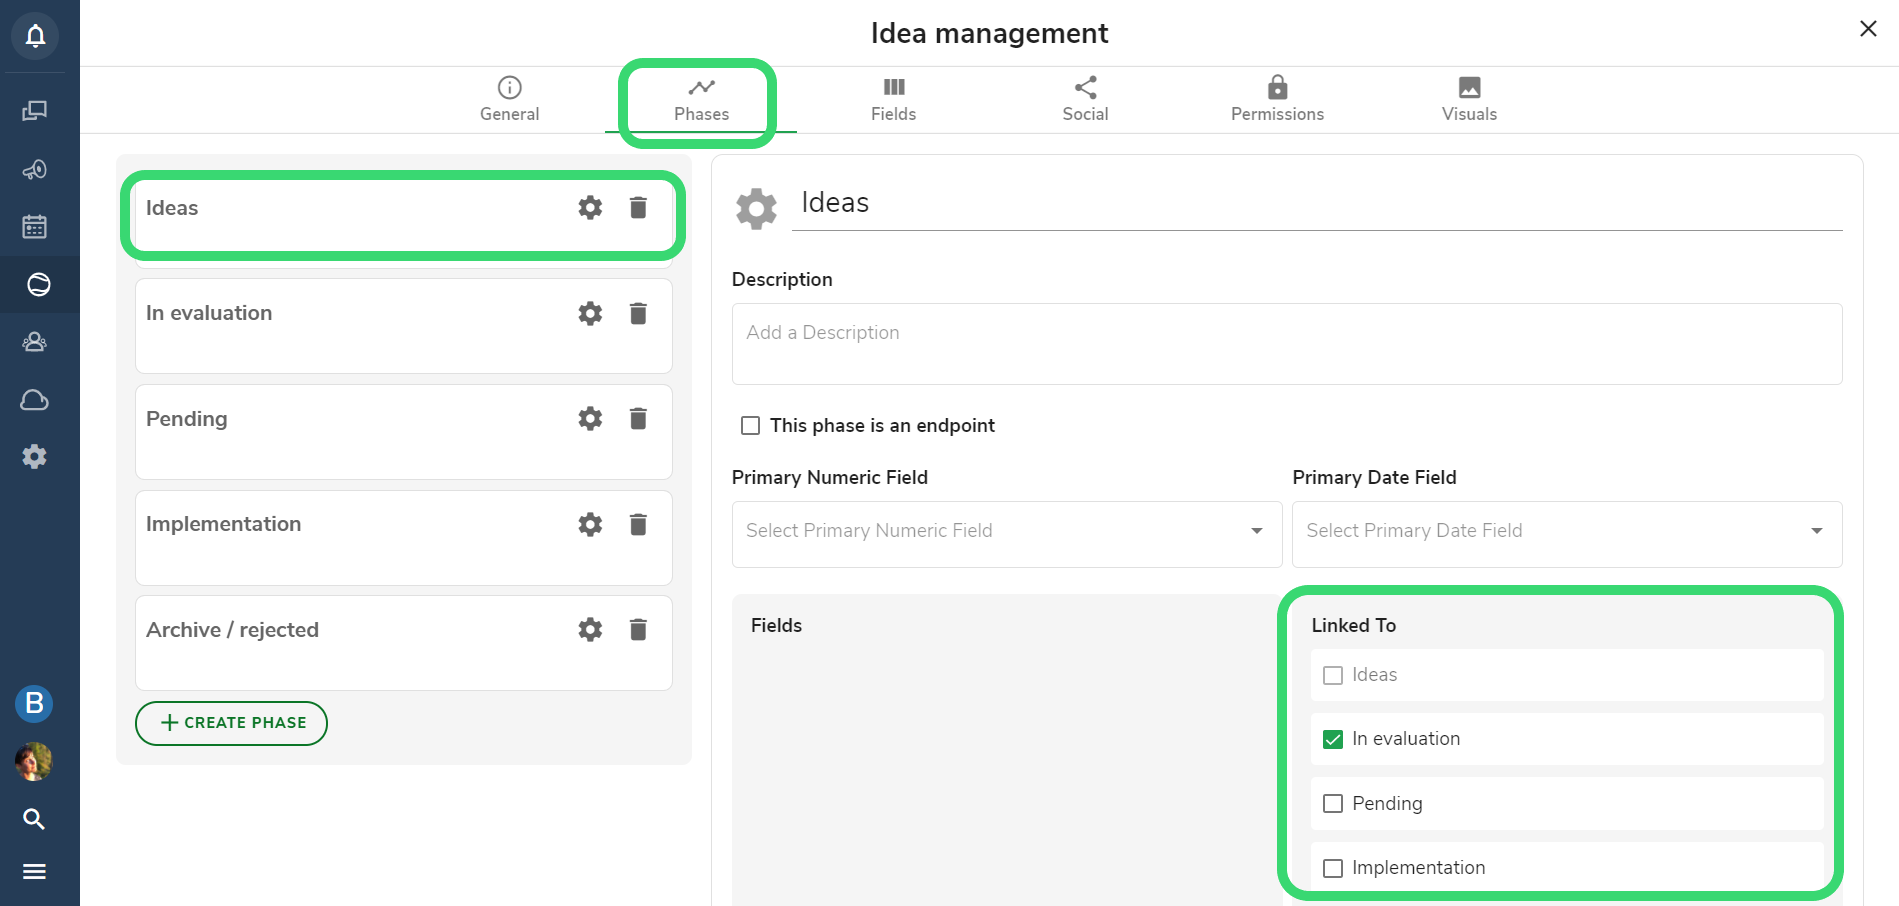
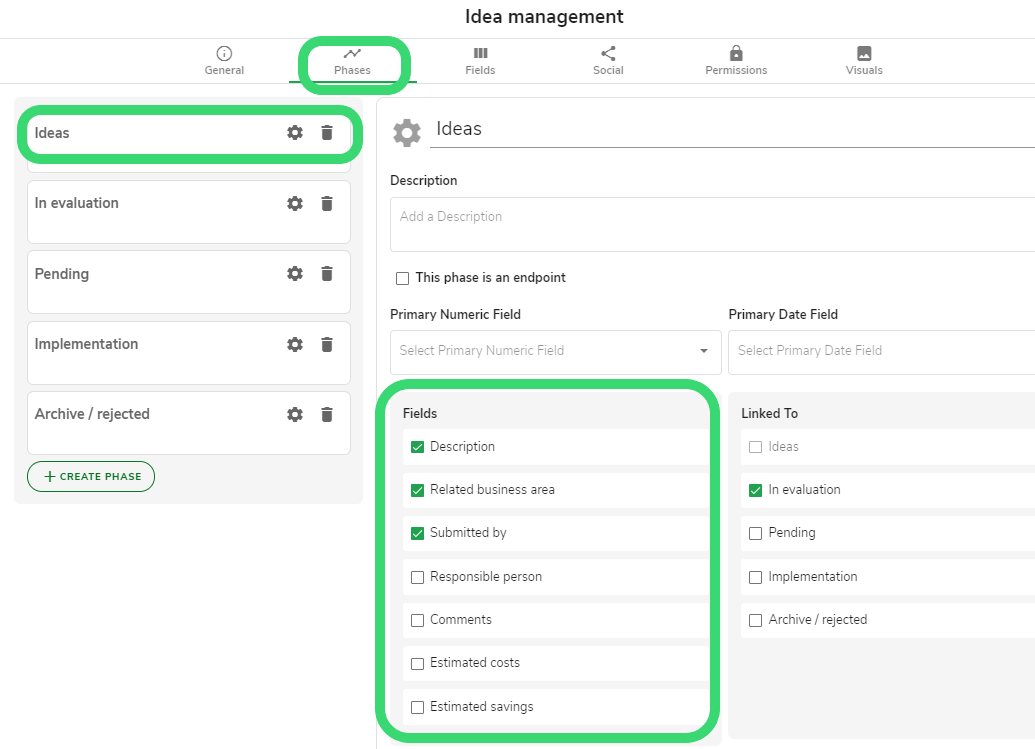
As an example, an idea management workflow module and the phases tab in the process settings.
You can modify the workflow phases as needed.
Remember to link the phases to create the actual flow between the phases. Linking happens in the Linked To box. You need to define the linking for each phase.
Define your workflow fields
The number of fields in a process is not limited; the available field types are:
- Text - a single line of text
- Predefined Options - create a drop-down of categories
- Text Area - a longer text area
- Numeric
- Numeric Unit - a numeric field, you decide the unit %$€
- Date
- Date Range
- Time
- Time Range
- Country -use this if you wish to use the map view
- Activity - Link activity to any activity in any module
- User - Link activity to any user in the network
- Team - Link activity to any team in the network
In addition to these fields, any activity can have a location - specified with coordinates and visible on a map. Files can be attached to any activity.
Most field types can also be made into function fields. In the function fields, you can type in with Javascript a set of rules according to which the function returns a certain value or result. The function fields are automatically sandboxed on a virtual server.
You can add unlimited amount of fields and edit the fields in the process settings "Fields" tab.
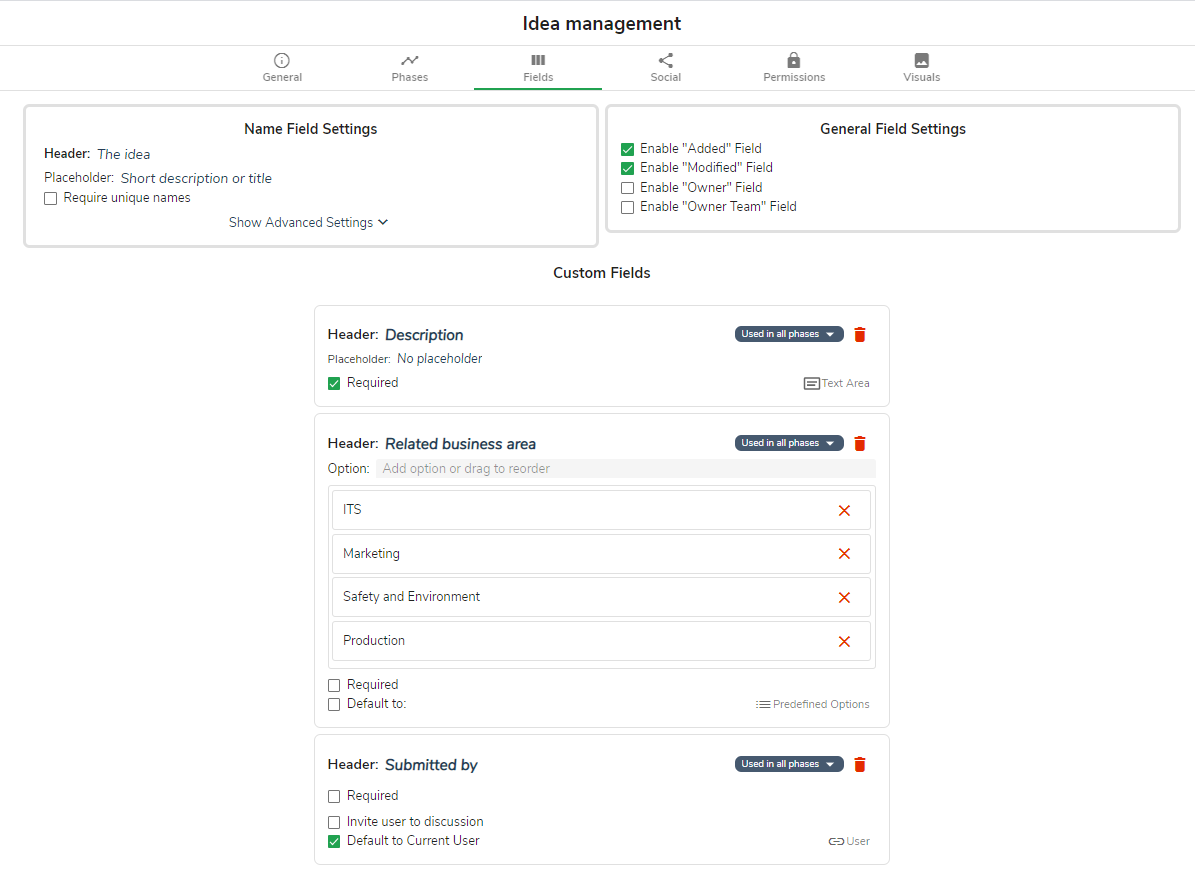
For example, in the idea management workflow, the data fields could be the following in the two first phases:
- "Ideas" phase:
- The idea (this is the title)
- Description (text area)
- Related business area or department (predefined text field) (ITS, Marketing, Safety&Environment, Production)
- Submitted by (user select field, default to current user)
- "In evaluation" phase (in addition to all previous fields)
- Responsible person (user select, invite user when selected enabled)
- Comments (text area)
- Estimated savings (numeric with Unit)
- Estimated costs (numeric with Unit)
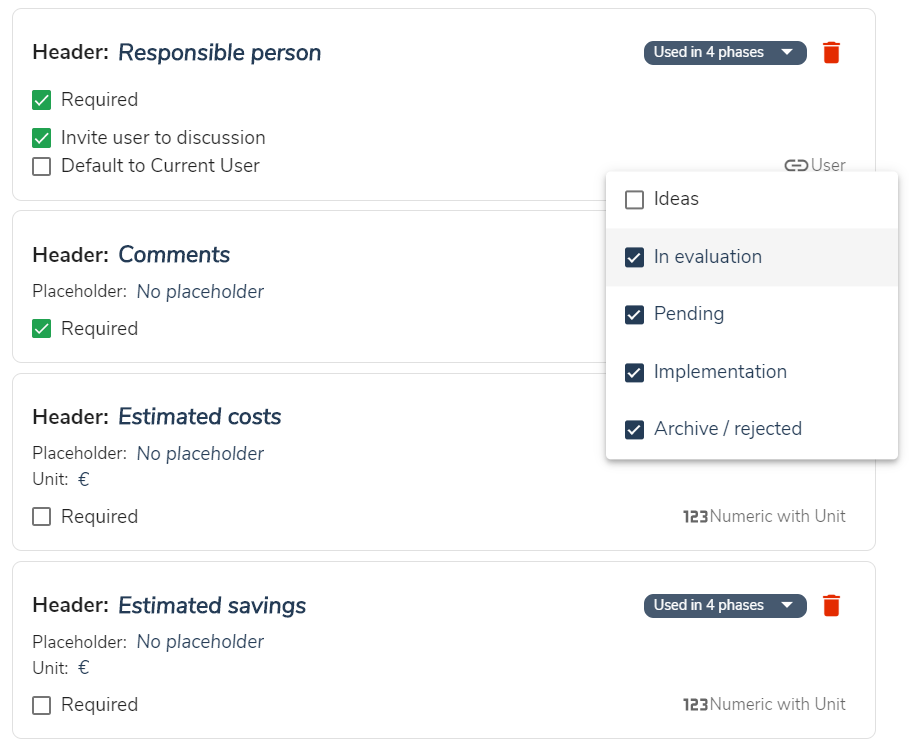
Any of the fields can be required, this way the user is forced to fill it in before adding or moving an idea.
You can also define in what phase you want to show the fields. You can do this from the fields tab from the drop-down "Used in" (picture above) or from the Phases tab (picture below).
Here is a short video about the different field types:
And how the different fields look in practise:
More tutorials also in our blog: How to Hailer

