Create an automated email notification when a new activity is added to a certain phase in your workflow.
Before you start doing anything make sure that the workspace you will be working with has Enterprise level, you have an account for Zapier and also for Mailgun or other email delivery services.
If you don't have the following accounts contact info@hailer.com and we can set up the email notifier for your company.
Having a Visual Studio Code or similar code editor software will surely help for code editing in later steps.
In this tutorial, we will be jumping back and forth a little bit from Hailer to Zapier to VS Code so keep your windows sorted :)
Use case behind this tutorial is that a customer can make a booking for a bike service by using the Hailer form and would like to receive some sort of confirmation of the booking, preferably by email in our case.
Step 1. Activate Webhooks
First things first!
Before doing anything we need to activate our webhooks for a certain phase.
Go to your selected workspaces “Activities” tab and hit the kebab menu icon and select “Settings” from the workflow your email notification will relate to.

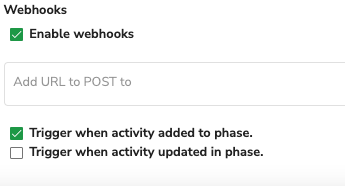
Now while in settings select the “Phases” tab. From there you can select which phase will work as a trigger and when it should activate. In this tutorial, we will trigger it when the activity gets added to the phase. You can leave the “Add URL to POST to” field empty for now, we will soon get back there!
Now we can open Zapier and start to create the webhook. Follow the rules of your organization on how to create a new Zap! Before jumping into "Action".
The next step would be opening the Webhooks by Zapier app. If that app is not visible on the list, just type it into the Search apps field.

After you have managed to open the Webhooks by Zapier app we choose the "Trigger Event"
For this use case, we will be using the “Catch Raw Hook” event. Select it from the dropdown menu.

After we have done that we should receive a Webhook URL. Now we need to copy this to our clipboard. We will paste this in Hailer.

This is the place I told you to leave open to another tab or window earlier ;)
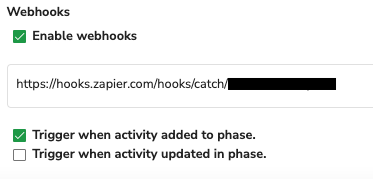
Paste the URL you copied from Zapier to the “Add URL to POST to” field.
After this, we jump back to Zapier and press the “Test trigger” button so we can see that everything is fine.
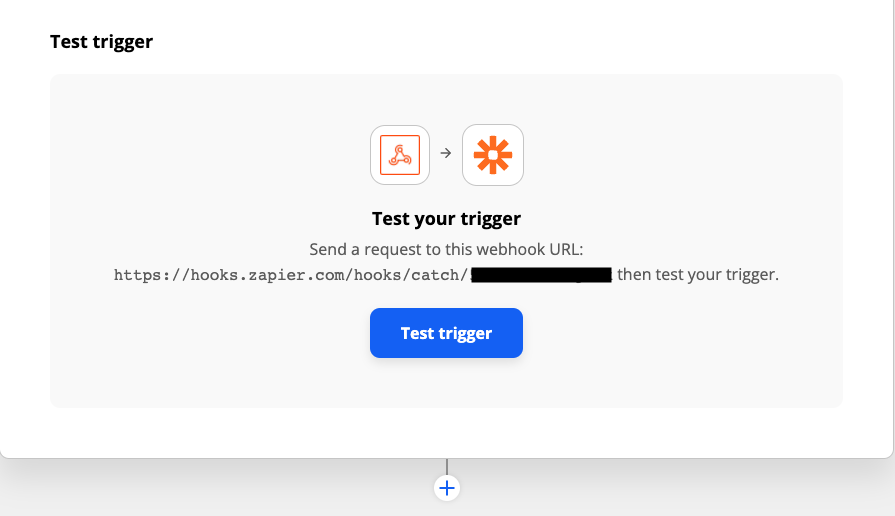
If the test works it should return you a bunch of code starting with “raw_body”.
Now you need to copy this whole code snippet and paste it to VS code.
For better readability select JSON with comments as the language.

Now we have Step 1. Completed and we can move on to the second step.
Step 2. Parsing the code
Now that we have the whole code snippet in VS Code we can edit it just slightly.
On row 4 you can see the small left-pointing arrow, this means that rows 4-22 are hidden. These rows contain information we don’t need to accomplish this task so we can just delete those from the way.

Before jumping to this next step I would suggest opening a new tab for VS Code as we are going to paste something else there as well and for easier working, we would like to keep these two in separate tabs.
Now we open Hailer again.
Go back to your workspace and select a phase from where you will select one of the rows. Make sure that this row has data if not in all then at least in all the relative fields you would like to use in your mail template.
Select the gear icon from the side tab and then press the (i) icon. Select “Copy Raw Activity”.

Open VS Code and paste the “Raw Activity” to an empty tab. We will use this and the raw_body as a guide for finding the correct id numbers for the code we will be feeding in the Zapier. You can use the input in the value field as a guide/reference when finding the right id’s.
Just be careful - it’s quite common that the same kind of data might be in two different fields!
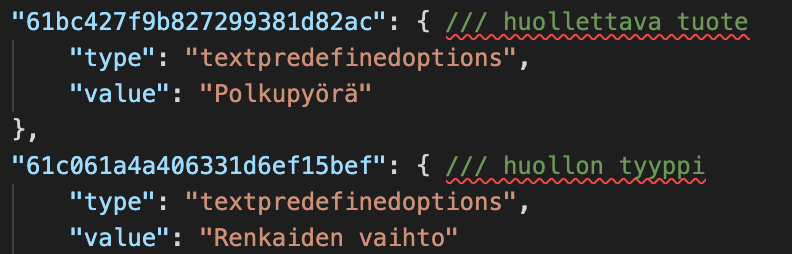
You add your notes in VS Code (as seen in the green text, the picture below). The best practice would be to use the same names as used in the original form to avoid confusion.
In theory, we could get this all in the raw_body document but just to be sure it’s good to have the “Raw Activity” as a reference. And to be honest, the raw_body doesn’t always include all the information we would need.
Nex you can open this code snippet in your code editor, where you will be filling in the information that you got from raw_body and "Raw Activity".
After this document is completed we can go back to Zapier, add another step and choose the app “Code by Zapier”
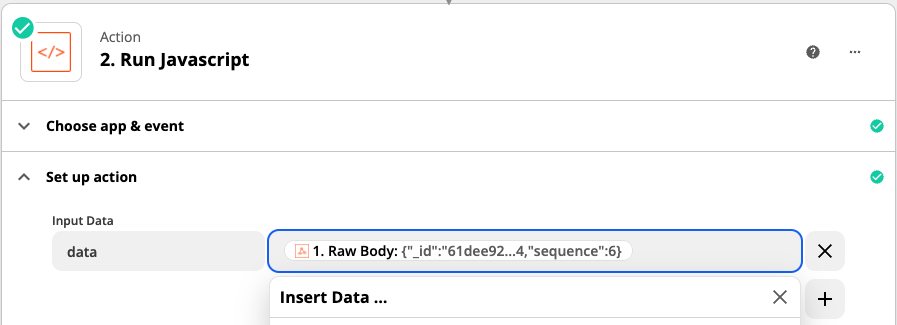
Choose from the “Action Event” dropdown menu then select “Run Javascript” and press continue

Write “data” in the “Input Data” text field. Choose “1. Raw Body” from the dropdown menu.
In the code field, you would now paste the code you created using the field names and id’s from raw_body and “Raw Activity”.

After that, you can use the “Test action” feature in Zapier and it will tell you if the code works or not.
If it works successfully hit “Retest & Review” and if everything is still ok press “Retest & Continue”.

Step 3. Send email in Mailgun
The final step!
It’s time to create the actual template and message for the email.
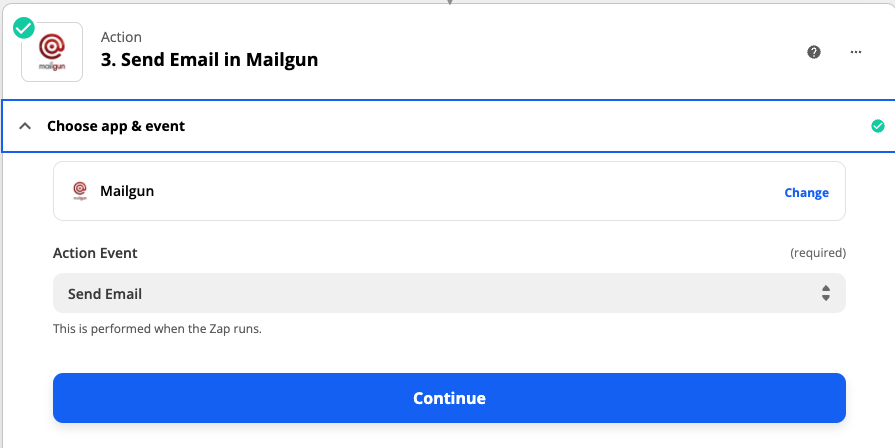
In this step, you choose Mailgun from the “Choose app & event” selection. After that select “Send email” from the “Action Event” dropdown menu.
In the choose account field, you have to fill up your organization's Mailgun account. Do note that if your organization uses Mail by Zapier etc you can use that as well.

Next, we jump into the “Set up action” phase where we tell who should receive and what they should receive when the webhook is triggered in Hailer.
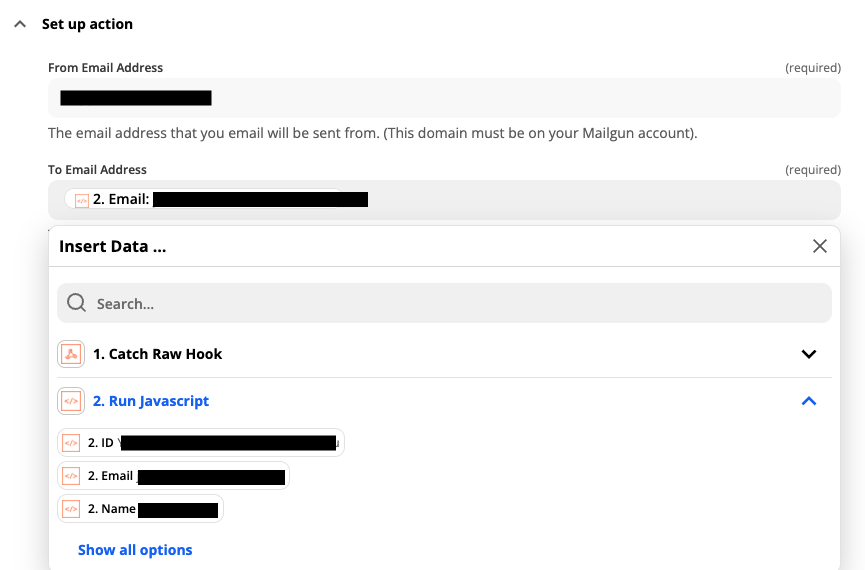
In this step, you can either type in information or use the “Run Javascript” feature. Or you can even mix both!
In the use case pictured above, we are sending a confirmation email back to the client so they can see what information they have given us. You can also define it so that “To email address” would always be the same when you write it there.
Here you can see an example where I’ve typed in ‘Tilausvahvistus / ‘ and then used the “Run Javascript” to fetch the name that the user had filled up in the form.
The email subject would look like “Tilausvahvistus / Matti Meikäläinen” when the user receives this email confirmation.

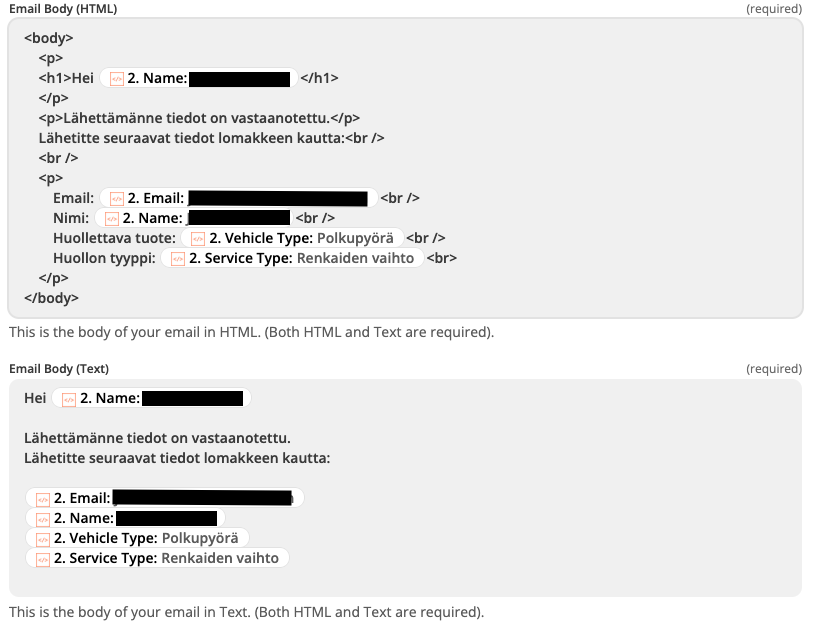
Next up we will fill up the actual message that will be sent to the receiver. You have to write it in both HTML and text only.
When filling up the HTML body you can define font sizes and styling etc. In this case, we are using headers and defined formatting according to the client's wishes. If you want to use a “normal” font size for everything you don’t have to define it separately.
When the message is finished you can test your message in “Test Action” phase.

This is what the message we created earlier would look like when the user receives it:

If everything looks like it should turn on your Zap to activate it!