How to get started with our prebuilt CRM workflow template
In this document, we will go thru the initial setup and in what order you should create activities for the freshly generated workflow.
Step 1. Add activities to your "Customers" dataset
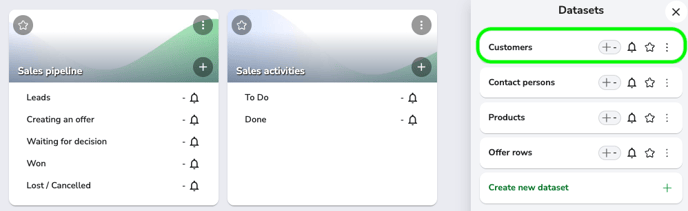
You can start by opening the "Customers" dataset or by clicking the (+) icon.
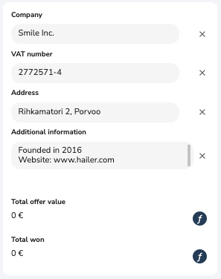
Notice that, at this point only required field is the "Company" field.
Hit the "Save" button once you are done, you can always get back to the same company's information and add or change information there.
You can also use Excel to import data to Hailer!
How to import data to Hailer
Step 2. Adding and connecting contact persons to a company
Now that we are adding contact persons and probably want to connect (or link as we say) them with a company they belong to it comes in handy to have the companies added already.
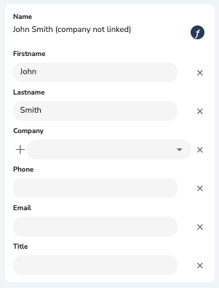
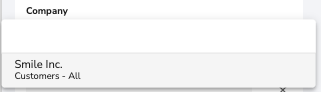
As you can see, the Company field is a dropdown field which allows you to see the list of the companies you've created.
By clicking the (+) -icon it is possible to add a new company to the "Customers" dataset, and it will take you to the same view we had in Step 1.
Step 3. Adding products
If your company sells products or services you can move on to adding these activities.
Open up the Products dataset, the same way you did in the previous steps.
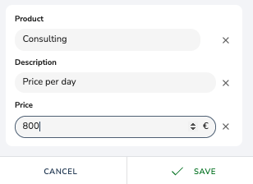
Once again, the only required field is the product name. But keep in mind, to get the full potential out of offer rows and other datasets and workflows, this field comes quite useful.
Step 4. Adding your first sales leads to the Sales pipeline
Time to add some leads!
Now that you're becoming a pro at creating activities, you probably know what's coming up 😉
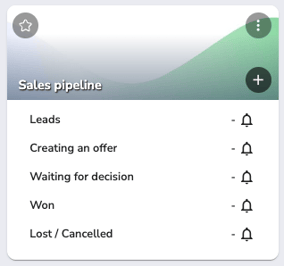
Hit the (+) icon to create a new activity in the "Sales pipeline" workflow
Now you see why we started with adding customers and contact persons first!
As you have all the data already available it's quite fast to start creating leads and other stuff.
It is also possible to create customers and contact persons on the go from the Sales pipeline workflow. Here's a quick video on how to do that.
Step 5. Create sales activities and order rows
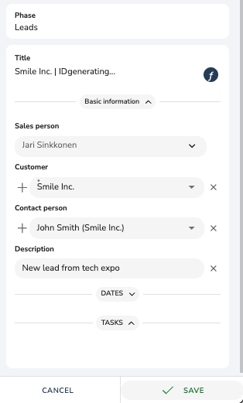
Start by choosing any activity in your Sales pipeline
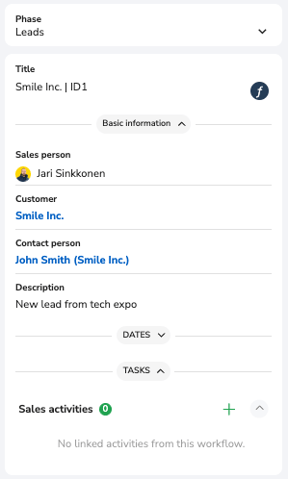
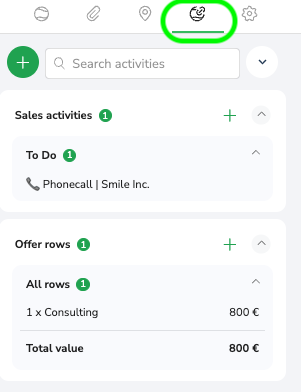
As you can see at the bottom of your activity card, there is this "Sales activities" section.
Hit the green (+) icon to create a new sales activity.
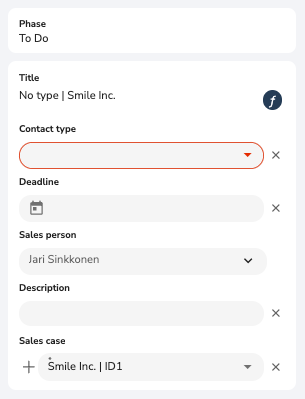
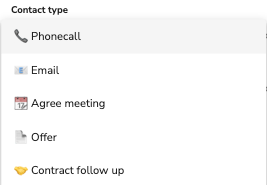
Fill in the information you need for the task and choose the best describing "Contact Type" for your sales activity.
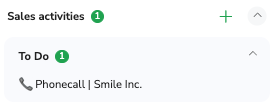
Once you've saved this, all your sales activities will now be displayed in the main activity in the Sales pipeline workflow.
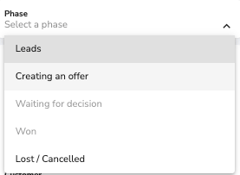
After you're done with your sales activities, you could move the main activity to the next phase.
In our case, we will be moving it to the "Creating an offer" phase.
Phase selection is located at the top of your sales pipeline activity card, simply choose the desired phase and save.
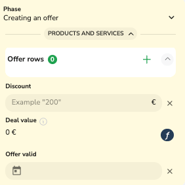
Upon choosing the phase it is possible that you will see more fields than in the current phase.
That happens in our case as well and it is now possible to add order rows. We can do this right away or after saving.
Adding offer rows
Adding offer rows follows the same logic as in adding new "Sales activities".
Click the green (+) icon and it will open the "Offer rows" dataset activity card.
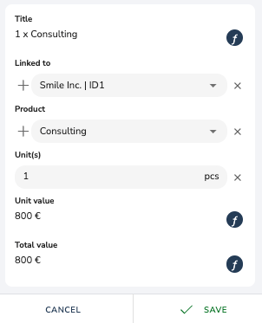
If you've added activities to your Product dataset, they will appear in the "Product" dropdown
Now if you added the price for your product, it will be used here for calculating the Unit value and Total value.
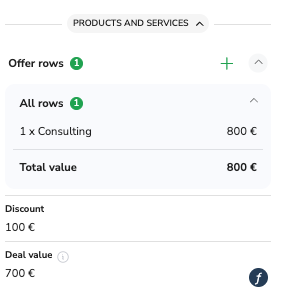
Now you can see all the added order rows in your main activity.
Review of the customer activity card
Now that we have some data inside Hailer, the customer dataset collects all the data you've fed into other processes
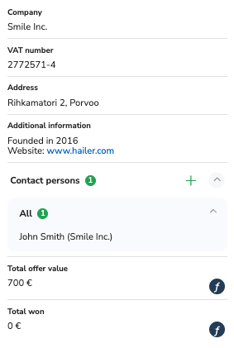
We were talking about linking earlier in this how-to document. You can see where your customer activity is linked from the "Linked activities" tab.
This helps us to get the full picture of what is happening around our customers.
Next steps?
Are you interested in adding automation to your workflows or need help setting up your workspace? Contact info@hailer.com or check out more tips from here: Simple automation tutorial